Wednesday, 7 November 2012

Continued ...


South Korean artist Yun-Woo Choi creates mind-bending three-dimensional sculptures out of rolled-up recycled magazines like artist David Mach. Captivated by theoretical physics and the notion of multiple dimensions (14 in all, according to scientists), Choi uses his art to explore the possibility that emotions, dreams and even god occupy some kind of invisible space. And he does all this without creating a pile of waste.
South Korea, NYC, Yun-Woo Choi, recycled art, recycled materials, green design, sustainable design, eco-design, eco-art, sustainable art, sculpture, 3-D, physics, science

 
Using resin, wire and recycled newspapers and magazines, Choi creates 3-D sculptures that are at once ephemeral and actually quite solid. The giant funnel that protrudes from a wall looks very similar to Alicia Martin’s book sculptures that appear to pour out of walls – at least in terms of its apparent strength.
 
green design, eco design, sustainable design, Alicia Martin, book art, recycled books, book sculptures, Biografies, book sculpture
 
I find a great energy and momentum are captured in these pieces , alot of ideas to be taken from the artists use of materials and use of recycled goods and textures

Tuesday, 23 October 2012

box time

Moving away from these little sculptures and on to video ...
i next plan to build a box frame so that i can recreate the visual stepping sensation , the pressure the foot undergoes as well as how the foot falls naturally

the frame will most likely consist of a simple wooden box frame stong enough to take the weight of the glass and my own body .. fingers crossed it won't break !!

looking to the artist Tadashi Kawamata for inspiration ... in particular his tempory structure unstallations


above we have a house/kiosk constucted on scaffolding .. i plan to make my box frame easily constrctable as well as simple to deconstruct , similar to his design for a visually pleasing finish.
textures will also be copied from his versaille installations
[kawamata+versailles+2.jpg]

his piece here (above) is reminiscent of artist david Mach's work in his waves in waves installation (below)

Monday, 22 October 2012

i tried a second colour yet it leaked out out while drying so there wasn't enough wax to fill the base
to the glue gun again !

i tried to make a marbled effect with my next piece

i kept dropping bits of dye into the wax


the properly sealed silicon made a great  cast , the colours look a bit infected though

all casts together ... looking well ;)


Silicon taken off without ripping ... delighted !!

now to add the wax ... stabblised on wood 

hopefully no air pockets will get caught

i propped  it up with clay


it unfortunately leaked a bit .. a little rip easily sealed with glue :)

no to take the wax out

Next on the plan was to cast silicon on the plaster cast so that i could mould wax into it

Started by inverting the plaster and standing it on a piece of wood


silicon was then painted on using two sticks 


the silicon was gently applied as to not catch air bubbles

i didn't want to cover the entire foot so kept it just to the base as i only wanted to replicate the ridges of the foot

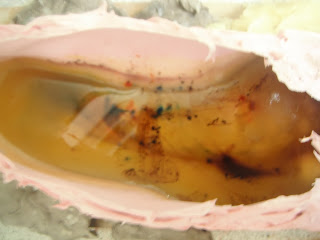
plaster cast all made ... delighted how it turned out .. pitty an air bubble or two got caught


Decided the best way to show my plaster cast is to present it in video form ... bringing the 3d back to 2d

Sunday, 21 October 2012

a mix of plaster was mixed into the boot to create a mould for the actual plaster next

it was one of the weirdest experience ever .. it was like a suction cup taking my foot out

Debating the best way to present my cast work

WE'll start with the the boot i made to cast my foot ... it was composed out of a simple block of wood for the base .. i then used card to make the outter shape of the boot and insulated the piece with masking tape

i then cut a hole to make sure my foot could easily fit in and out

Embedded image permalink


Wednesday, 17 October 2012

We see here the original back of the foot , i used a spring coil shape for it's base followed by an inside frame to give it a sturdyness so that it can stand upright without aid
To attach all the components of the toe together and to attach this the main structure , i wrapped a thin wire continuously around the edges. Notice the loop at the top, this was used as a joint to give flexibility to the toe.

Top view of piece before being all attached.

Rear view of piece

Front elevation

The same top view but on white paper the accentuate the strands of wire.

I started this sculpture by twisting wire into a concentric circle design to mimic the ridges of the foot


I next coiled wire into a barrel shape to replicate the top of the toe


The 5 toes together .. unpaired 2b pencil beside to show scale

Rear view of top of foot .. this was the heel of the sculpture


Behind the toes are two springy coils of wire , these are the balls of the foot